Mastering Juicy Kofta Kebabs: Grill, Pan-Sear, or Bake to Perfection
There are few culinary experiences as deeply satisfying and universally beloved as a perfectly cooked kofta kebab. These cylindrical delights, bursting with aromatic spices and tender, succulent meat, transport you straight to the bustling markets and warm evenings of the Middle East. Whether you're a seasoned chef or a home cook looking to elevate your weeknight meals, mastering the art of the juicy kofta kebab is a rewarding journey. Forget dry, crumbly meat; our guide will show you how to achieve an unparalleled level of flavor and moisture, whether you choose to grill, pan-sear, or bake them to perfection.
Kofta kebabs are more than just ground meat on a stick; they represent a rich culinary heritage, a harmony of robust flavors, and a testament to centuries of culinary craftsmanship. From spontaneous backyard cookouts to elegant family gatherings, these versatile kebabs promise a dining experience that's both comforting and exotic, turning simple ingredients into a remarkable feast.
The Heart of the Matter: Crafting the Perfect Kofta Mixture
The secret to an unforgettable kofta kebab lies undeniably in its foundation: the meat mixture. This is where flavor, texture, and juiciness are first locked in. Every bite should deliver a complex profile of warmth, depth, and cultural significance that transcends mere sustenance.
- Choosing Your Ground Meat: While traditional recipes often feature ground lamb for its rich, distinctive flavor, a blend of beef and lamb is also popular, offering a balanced taste and texture. The key is to select freshly ground meat with a moderate fat content. Lean meats can result in dry kofta, so aim for around 80/20 lean-to-fat ratio. The fat renders during cooking, contributing significantly to that coveted juiciness.
- Aromatics and Fresh Herbs: These are non-negotiable for authentic flavor. Finely minced onion provides moisture and a foundational sweetness, while plenty of fresh garlic is essential. For herbs, flat-leaf parsley and fresh mint are classic choices, offering brightness and a fragrant aroma that cuts through the richness of the meat. Ensure all aromatics are very finely chopped or grated to integrate seamlessly into the mixture without creating large chunks.
- The Spice Blend: The Soul of Kofta: This is where the magic truly happens. A carefully balanced blend of warm Middle Eastern spices is what defines a kofta kebab. Common spices include cumin, coriander, paprika, allspice, cinnamon, and a pinch of cayenne or black pepper for a subtle kick. Some blends might also include nutmeg or cloves. Each spice plays a role, adding layers of warmth, earthiness, and a tantalizing aroma that fills the air as the kebabs cook. For a deeper dive into creating the perfect aromatic blend, explore The Secret to Flavorful Kofta: Spices, Herbs, and Authentic Middle Eastern Taste.
- Binding and Juiciness – The Breadcrumb Debate: Many recipes call for breadcrumbs or soaked bread to help bind the meat and add moisture. However, culinary wisdom suggests that for the juiciest kofta, it's often best to skip them. In our experience, adding bread can sometimes dry out the kofta, especially if the meat mixture already has a good fat content and is properly handled. Instead, we recommend thoroughly mixing your spices and aromatics into the meat, then letting the mixture rest in the fridge for a few hours. This crucial resting period not only allows the flavors to meld and deepen but also helps the proteins firm up, binding the meat naturally without the need for additional fillers.
- Mixing and Resting: Don't be shy with your hands! Mix the ingredients thoroughly until just combined, ensuring everything is evenly distributed. Overmixing can toughen the meat, so stop as soon as it comes together. As mentioned, a minimum of 30 minutes to an hour of chilling in the fridge, or ideally a few hours, works wonders for both flavor development and making the mixture easier to handle and shape.
Shaping and Skewering for Success
Once your kofta mixture is perfectly seasoned and rested, the next step is shaping these flavorful morsels with precision and passion. Proper shaping ensures even cooking and prevents the kebabs from falling apart.
- Preparing Your Skewers: If using wooden skewers, soak them in water for at least 30 minutes before use. This prevents them from burning on the grill and helps the kofta release more easily. Metal skewers are also an excellent choice, conducting heat well and being reusable.
- Molding the Kofta: Take a portion of the meat mixture (about 2-3 tablespoons per kebab, depending on desired size) and gently press it around a skewer, forming a cylindrical shape. Aim for an even thickness along the skewer to ensure uniform cooking. Many skilled chefs create small indentations along the length of the kofta with their fingers, which not only adds to the aesthetic but can also help it cook more evenly and retain its shape. Ensure the meat is firmly pressed onto the skewer, especially at the ends, to prevent it from slipping off during cooking.
- A Touch of Olive Oil: Right before cooking, lightly brush each shaped kofta kebab with a good quality olive oil. This step is key for achieving that beautiful golden-brown crust and locking in the precious juices.
Cooking Methods: Grill, Pan-Sear, or Bake?
The versatility of kofta kebabs shines through in the myriad ways you can cook them, each method imparting its own unique characteristics. Regardless of your chosen technique, patience is key to achieving that tender, succulent interior and enticing exterior.
Grilling: The Authentic Smoky Char
Grilling is arguably the most traditional and beloved method, infusing your kofta with irresistible smoky undertones that complement the intricate spice combinations.
- Preparation: Preheat your grill (charcoal or gas) to a medium-high heat. Clean the grates thoroughly and oil them to prevent sticking.
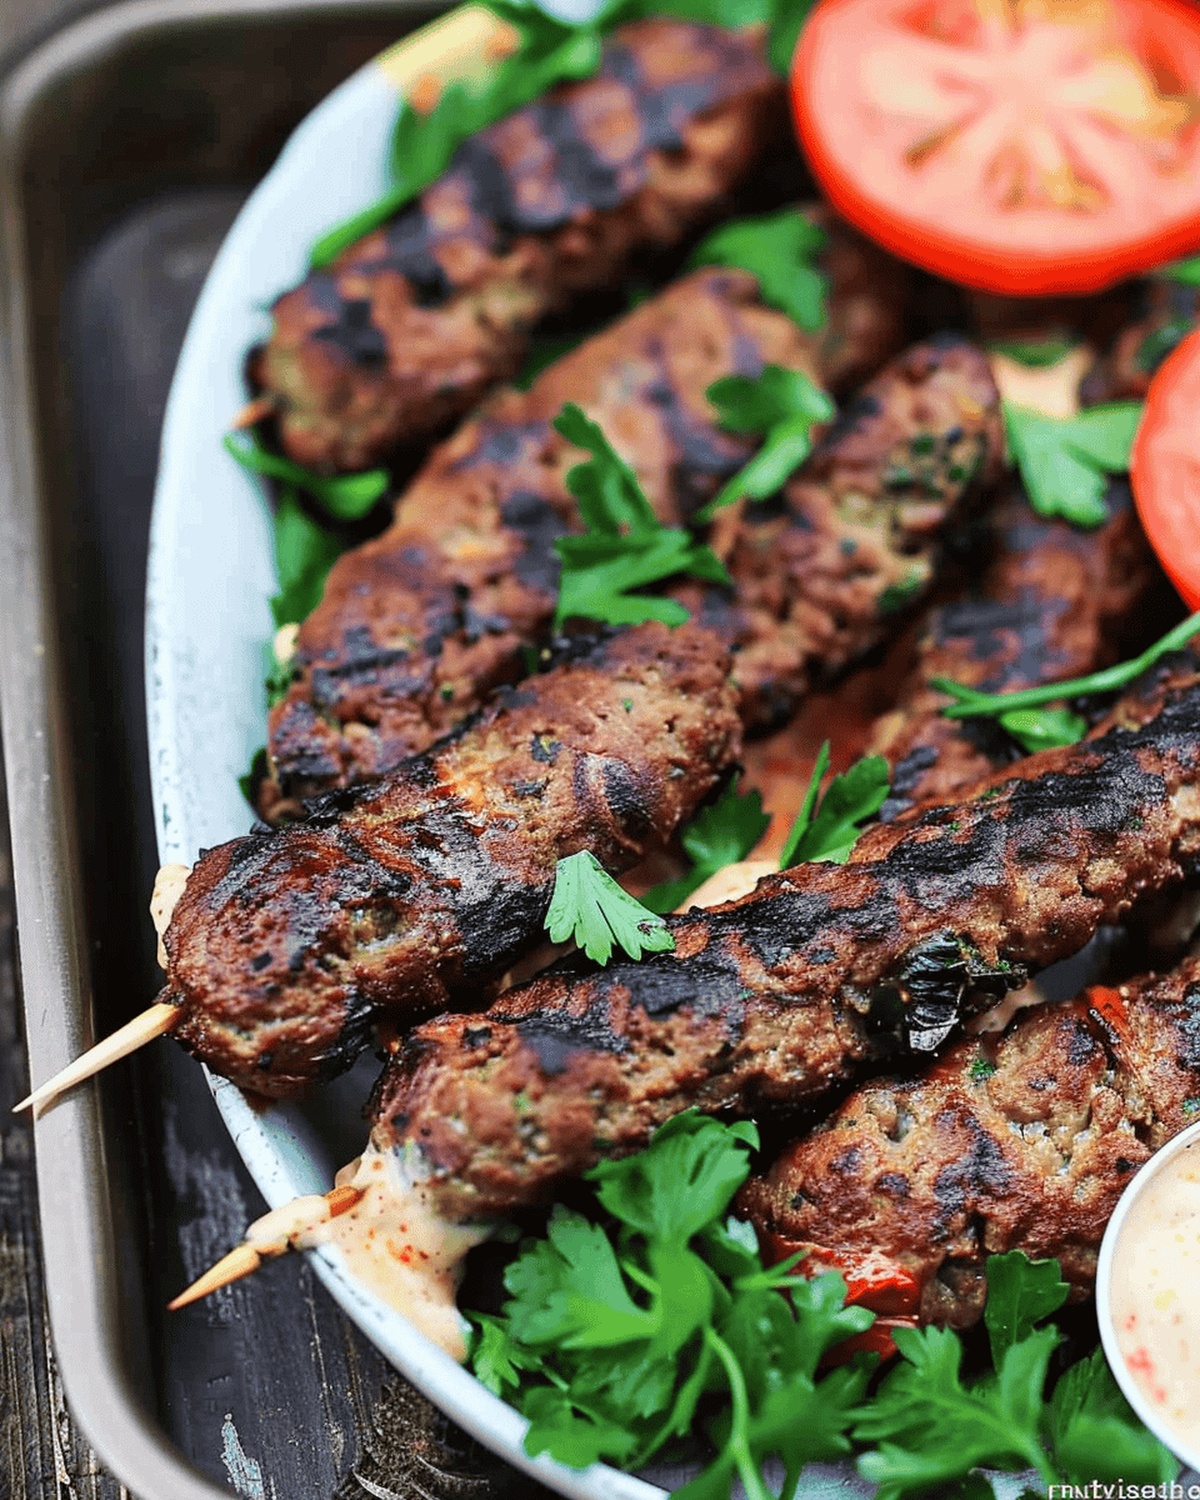
- Technique: Place the olive oil-brushed kofta kebabs directly on the hot grill. The golden rule for juicy kebabs is to flip them only once. Grill for about 4 minutes on the first side, allowing a beautiful char to develop and the juices to seal in. Then, carefully flip them and grill for another 3-4 minutes on the other side, or until they are cooked through and have reached an internal temperature of 160°F (71°C). The exact timing may vary based on the thickness of your kebabs and grill temperature.
- Result: Expect a slightly crisp, smoky exterior and a wonderfully tender, juicy interior.
Pan-Searing: Indoor Perfection
When outdoor grilling isn't an option, pan-searing on the stovetop is an excellent alternative, delivering a fantastic crust and moist interior.
- Preparation: Heat a heavy-bottomed skillet or cast-iron pan over medium-high heat. Add a tablespoon of olive oil or a neutral cooking oil.
- Technique: Once the oil is shimmering, carefully place the kofta kebabs in the pan, ensuring not to overcrowd it. Cook in batches if necessary. Similar to grilling, aim to flip only once. Sear for 4-5 minutes per side, rotating to get an even browning, until they're cooked through and have a beautiful golden-brown crust.
- Result: A rich, browned exterior and a tender, juicy center, perfect for a quick weeknight meal.
Baking: The Hands-Off Approach
Baking offers a healthier, often hands-off method for cooking kofta kebabs, especially appealing for larger batches or when you prefer not to deal with grilling or searing.
- Preparation: Preheat your oven to 400°F (200°C). Line a baking sheet with parchment paper or foil for easy cleanup, and place a wire rack on top. This allows air to circulate around the kebabs, ensuring even cooking.
- Technique: Arrange the olive oil-brushed kofta kebabs on the wire rack, making sure they don't touch. Bake for 15-20 minutes, flipping halfway through, or until they are cooked through and nicely browned. For an extra touch of char, you can briefly finish them under the broiler for 1-2 minutes, watching carefully to prevent burning.
- Result: Evenly cooked, tender, and juicy kebabs, with minimal effort.
Serving Your Masterpiece: A Feast for the Senses
Kofta kebabs are a staple of Middle Eastern BBQ spreads, often referred to as Mashawi, where grilled meats are presented alongside a vibrant array of dips, fresh salads, and warm bread. The serving options are as rich and varied as the kebabs themselves.
- Creamy Dips: Start with classic creamy dips like hummus or baba ghanoush (smoky roasted eggplant dip) for a truly authentic experience. If you're seeking something with a different profile, muhammara—a delicious dip made with roasted red peppers and walnuts—adds a perfect sweet and spicy kick. A refreshing yogurt-based sauce, perhaps with cucumber and mint, also pairs wonderfully.
- Fresh Salads: Complement the richness of the kofta with crisp, fresh salads. A simple platter of sliced lettuce, ripe tomatoes, and cool cucumbers is essential. A vibrant tabbouleh or fattoush salad adds texture and tang.
- Warm Bread: No kofta kebab meal is complete without warm flatbread or pita bread, perfect for scooping up the meat and dips.
- Other Accompaniments: Tahini sauce drizzled over the kebabs, pickled vegetables, and a squeeze of fresh lemon juice all enhance the overall flavor profile.
Whether you’re aiming for an easy weeknight dinner ready in under 30 minutes, or a lavish weekend gathering, these kebabs are incredibly adaptable. Their flexibility invites personal creativity and different flavor combinations, making them a consistently delightful and satisfying meal.
Mastering juicy kofta kebabs is a journey that celebrates flavor, tradition, and the simple joy of cooking. By focusing on quality ingredients, careful preparation, and the right cooking technique, you can consistently achieve tender, flavorful, and incredibly juicy results every time. So gather your ingredients, fire up your grill, pan, or oven, and prepare to delight your senses with these truly exceptional Middle Eastern delicacies.
